

Wood Flooring Installation Guide
Pre-Installation Warranty IMPORTANT, PLEASE READ!
It is the duty of the installer/owner, whether professional or DIY (do it yourself), to inspect all flooring before installation. If the installer or buyer feels the flooring is the wrong color, improperly manufactured, has finish problems, is off-grade or is the wrong gloss level, DO NOT install the flooring. Please immediately contact the retailer from which the flooring was purchased. No claim will be accepted for flooring which is visibly wrong if such product is installed. Wood is a product of nature not plastic, and standard industry practice allows for up to 5%of flooring shipped having milling, handling, finish and/or grade defects. This warranty applies only to material in excess of this 5%, in additional to the industry standard 4~6% cutting waste. Stanley Cooper will replace or refund the purchase price of material deemed to be defective in excess of this 5%. PLEASE NOTE: It is the duty of the installer/home owner to judge the suitability of any piece for placement in a conspicuous area of the room. If you feel a piece is not suitable, either do not install it or install it in an inconspicuous place.
Product Use
Your new engineered flooring products can be installed Above-Grade, On-Grade or Below-Grade. It may be glued down over a plywood or concrete subfloor. It also may be stapled down over a plywood floor, using specially designed hardwood floor staplers, or installed using the “floating method”.
Jobsite Requirements
All work involving water or moisture should be complete before installing hardwood flooring. For any new construction or remodeling project, hardwood flooring should be one of the last items installed. The jobsite should be monitored for consistent, normal room temperature of 68 deg. F (20 deg. C) in winter and 74 deg. F (22 deg. C) in summer, and relative humidity of 40~60% for at least one week before installation. All your new engineered flooring should be kept in the shrink-wrapped boxes until immediately before installation. DO NOT remove from packaging and acclimate like solid hardwood floors! This can make the flooring very difficult to install. Do put boxes in
room long enough to get to room temperature. Our tolerances between the tongue and groove are so exact that any expansion of the tongue due to acclimation might make the T&G fit too tight for easy installation. DO NOT install in areas subject to moisture, such as bathrooms or laundry rooms. Although engineered plank flooring can be glued directly to concrete, DO NOT use a concrete sealer nor install over one. See adhesive manufacturer’s instructions and follow them to ensure problem free installation and access to their glue warranty. Stanley Cooper does not warrant the glue, rather the glue manufacturer warrants this. The concrete must be high compressive strength. All concrete subfloors should be tested for moisture content using the calcium chloride test. In case of a claim, the only acceptable, accurate test method for subfloor moisture content is the calcium chloride test. The maximum moisture transfer must not exceed 3 lbs. /1000 square feet with this test. If gluing down, consult adhesive manufacturer for proper slab preparation and suitability for your project.
A “DRY” SLAB, AS DEFINED BY THESE TESTS CAN BE WET AT OTHER TIMES OF THE YEAR. THESE TESTS DO NOT GUARANTEE A DRY SLAB.
All Subfloors Must Be Flat And Clean
The maximum tolerance is 3/16″ per 10′. If necessary, flatten out any irregularities using #20 grit paper and fill any low spots with leveling compound recommended by adhesive manufacturer. Prepare slab according to adhesive manufacturer’s recommendation.
Wood Subfloors Must Be
Dry and well secured, with moisture content under 12%. In addition to a 6-mil Polyfilm placed over the dirt / gravel in the crawl space. Adequate ventilation must exist, 1 ½% with clearance of 18″ to 24”.Nailed down or screwed down every 6 inches along the joist to avoid squeaking. Leave 1/8″ gap around perimeter of plywood sheets. Level by sanding or grinding down high spots and filling in low spots with an underlayment patch as necessary. Preferred subfloor: 3/4″ CDX grade Plywood subfloor / underlayment (Exposure 1), 4′ x 8′ sheets or 23/32″ OSB subfloor / underlayment grade, PS2 rated, sealed side down, with joist spacing of 19.2″ on center or less.
Concrete Subfloor Must Be
Fully cured for at least 90 days. Installed properly with minimum 6-mil Polyfilm between concrete and ground. Dry all year round. DO NOT install over concrete if you are not sure it will remain dry. Calcium chloride is the only recognized moisture test. Follow adhesive manufacturer’s suggestions.
Sheet Vinyl Must Be
Well bonded and fully glued to the floor. Do not install over perimeter glued floors. This warranty does not apply if not fully and securely bonded to subfloor.DO NOT install over vinyl thicker than 1/8″ or more than one layer of vinyl. In good condition. Clean and level, no debris.DO NOT install over vinyl tiles. Consult adhesive maker about suitability – Stanley Cooper does not warranty the adhesive. Follow adhesive maker’s guidelines. Abrading of the vinyl surface might be necessary.
Preparing For Installation
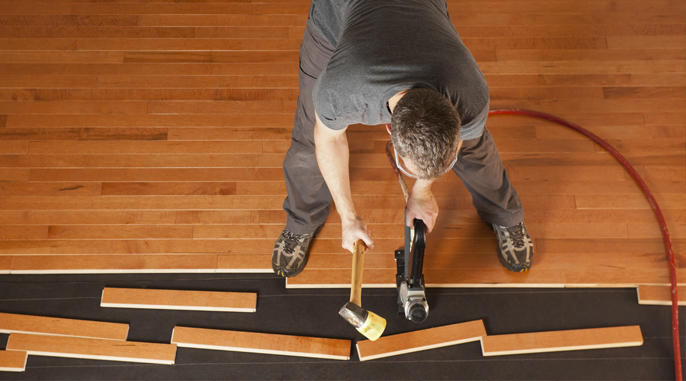
Undercut or notch-out door casings to fit flooring underneath by placing a piece of flooring on the subfloor as a height guide for sawing. Remove door thresholds and base moldings and replace after flooring installation. Always leave at least 1/2″ expansion space between flooring and all walls and vertical objects. Using a hammer and tapping block, tap against the tongue to pull planks together. Never tap against the groove of the plank. When near a wall, use a pull bar to close end joints. Be careful not to damage flooring edge. All your new engineered flooring is milled to very exacting standards, so pieces that do not go together easily usually have debris in a groove, the
tongue and / or groove has been damaged, or the board is a little bowed and you just need to flatten it out, rather than forcing pieces together.
Starting Installation
For a better appearance, wood flooring is normally laid parallel to the longest wall. However, owner upon the advice of professional installers should make the final decision in which direction the planks will run. If lying over existing wood floor, new wood floor should be installed at a 90 degree angle to the old wood floor. Most professional installers will begin installation next to an outside wall, which is usually the straightest wall and used as a reference point in establishing a straight working line. A good way to establish a working line is to measure an equal distance from the wall at both ends and snap a chalk line. Measure distance from the wall at the width of the plank plus another 1/2″ for expansion space for establishing your working line. It is advisable to dry lay a few rows before actually using glue to confirm your directional layout decision and working line. Adjustment of the working line may be necessary if the outside wall or other working line reference is out of square. This can be done by scribe cutting the first row of planks to match the wall and creating a straight working line. Don’t forget the 1/2″ expansion gap!
Glue Down Installation
For glue down installation we recommend environmentally-friendly solvent free urethane adhesives that meet and / or exceed the manufacturer’s specifications.
Your glue warranty comes from the adhesive manufacturer, not the floor manufacturer. Allow for adequate cross ventilation when working with flooring adhesive. Snap a chalk line 35 ½” from starting wall for 5”(125mm) and 7” (180mm) wide product, and 34 ½ from starting wall for 8 ½” wide (220mm).Nail down a straight board against this line to use as your firm, straight base to start working from. After laying the large part of the room, remove this board and fill in the 35 ½ ” or 34 ½ ” used as your starting working area. Follow adhesive instructions regarding proper set time (if any) before affixing flooring planks. With trowel at a 45-degree angle, spread as much adhesive as can be covered by flooring in one hour or as recommended by the adhesive manufacturer’s instructions. Once adhesive has set per instructions, lay the first row of flooring with the groove facing the starting wall, butted up against your straight starting board. Continue laying flooring until adhesive is covered with flooring. Be careful not to move the installed floor on the wet adhesive. Use a tapping block to fit the planks together. When the first section is completed, continue by repeating process section by section. Immediately remove any adhesive that gets on the flooring surface by using a damp cloth or manufacture’s adhesive remover. Damage to finish from dried on adhesive is NOT covered under warranty! Don’t forget to stagger joints. When required, use weights to hold the flooring planks on the perimeter until the adhesive cures enough.
Finishing The Job
Remove expansion spacers. Reinstall base and / or quarter round moldings to cover the expansion space. Install transitions pieces such as reducer strips and T-moldings as needed. DO NOT allow any foot traffic or heavy furniture for at least 24 hours or as indicated by adhesive instructions. Clean and remove all dirt and debris on floor by dust mopping or vacuuming. This hardwood floor is of an advanced technology, and following the floor care and maintenance guide to ensure longevity and lasting beauty of your new hardwood Floor is crucial, We recommend using the complete line of Loba care and maintenance products.
Staple Or Nail Down Installation
- Tool & Materials: Power saw, hammer, chalk line and tool listed below:
- Staple Gun: Stanley Floor Runner SX150-BHF-2 or equivalent
- Staples: 1-1/2″ staples are preferred, 1-1/4″ is minimum
Acceptable Subfloors Are The Following
- 5/8″ minimum thickness, preferred 3/4″ or thicker exterior plywood stamped by TECO or APA installed with long edges at right angle to floor joists and staggered so that end joints in adjacent panels break over different joists.
- 23/32″ minimum O.S.B. on 19.2″ center floor joists system properly nailed. ACQ treated plywood cannot be used. OSB must be stamped TECO or APA rated to insure proper construction.
- Moisture content is difficult to check with OSB, please check with OSB maker for proper testing method to ensure it is under 12% MC. New wood type subfloors should be checked for moisture using a moisture meter. In general wood or plywood subfloors should not exceed 12% moisture content, or 4% moisture content difference between hardwood flooring and subfloor. Adequate and proper nailing as well as soundness of the subfloor should be ascertained. Foreign material shall be removed from the subfloor surface and swept clean. The clean subfloor should be covered, wall-to-wall, with 15-lb asphalt saturated felt. Butt the edges of this felt when positioning it. Basement and crawl spaces must be dry and well ventilated. Crawl spaces must have a vapor barrier below subfloor on ground (6-mil Poly).
General Installation Instructions (See NWFA At www.nwfa.org For More Details)
- Flooring should be laid at right angles to the floor joists and, if possible, in the direction of the longest dimension of the room.
- Most pre-finished products have a UV-cured factory finish. It is important to make sure that the nail gun face plate will not damage the surface finish. 3M Blue tape can be placed on the faceplate to prevent damage. Keep face plate clean, scratching caused by abrasive material on nailer face plate may occur.
- Starting to lay flooring: Begin laying plank flooring in a room corner with the groove of the long side against adjacent wall. Face nail along the wall (counter sink and putty if not covered by trim) and blind nail in tongues. The second row normally will need hand nailing into the tongues as stapler probably cannot fit yet.
- End joints of plank: These should be staggered to achieve the best appearance in the finished floor. (minimum 10″)
- Nailing schedule for flooring: staple on 6″ to 8″ centers in the tongue, using 1-1/2” X ¼” crown, glue coated staple, also staple within 2″ of each end joint. The last few rows might require hand nailing and / or face nailing, countersinking, and filling with putty.
Important Notes:
- Baseboards should be installed so that their lower edge is slightly above the level of the finished floor but not nailed into the floor.
- If floor is radiant heated, only Hydronic type radiant heat floors.
- DO NOT install any product with visible defects.
- To avoid movement in hardwood floor, relative humidity should be maintained year round at 40%~60% Relative Humidity.
- The use of color coordinated wood floor putty to cover small cracks and gaps is considered normal in hardwood flooring installations.
- See Maintenance Guide for more information regarding helpful tips on keeping your floor new for years to come.
- Molding Tip: Before installation, match the closest board in color and grain to the adjoining molding profile color and grain. Save the board(s) and use next to the molding piece.